Before you start, you need a completed target, an experiment, write access, and sufficient compute access for the run.

Configure design

  1. Open the experiment and start a new virtual screen.
  2. Name the screen so you can identify its target hypothesis and binder choice.
  3. Choose the generative design type.
  4. Select the completed target and review its details.
  5. Choose a supported binder specification. Use a Boltz specification or a custom specification available in the project.
  6. Configure the screen size and other settings offered for that target.
  7. Review the configuration and submit when ready.
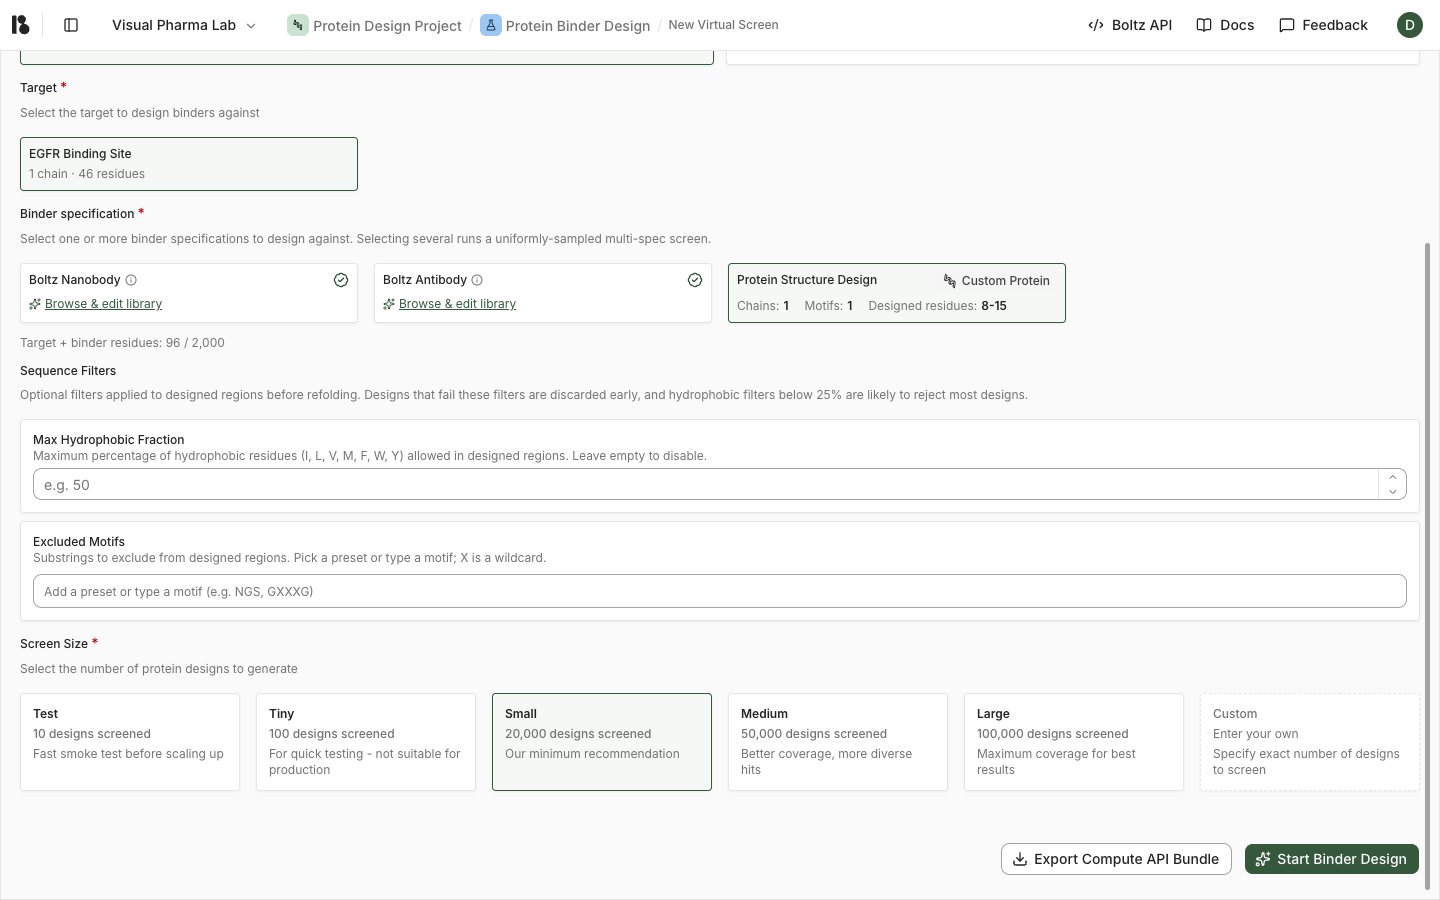
Protein design screen with target and binder inputs
The form determines which settings apply to the selected target. Review the available size or effort controls and any displayed cost information before starting the run.

Import candidates

Use the CSV import type when you want to evaluate existing candidates and that workflow is available in your project. Check the sequence columns, chain mappings, and selected target before submission. Use the example format offered by the uploader.

Monitor the screen

Open the screen overview to check status, progress, and configuration. Use the lifecycle actions offered for the current state. If the run fails or stops early, read the explanation before submitting another run. Open results when the run makes them available. The final screen status and returned-candidate summary identify the completed output. Continue to Review protein binder results.