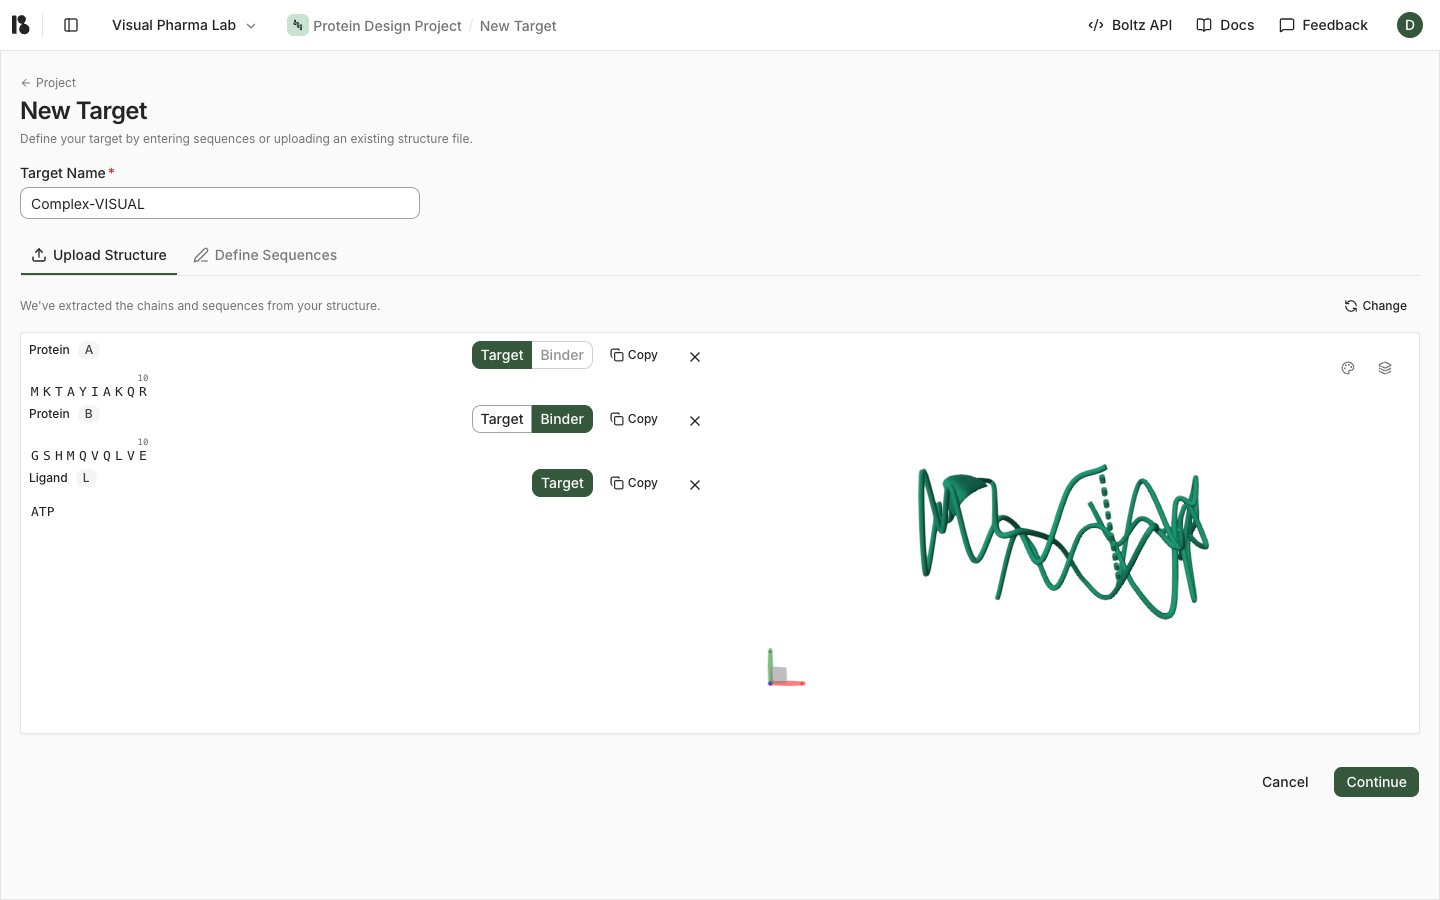
Before you start, open a Binder design project with write access. Have the target sequences or a supported structure file ready.

Add the target

  1. In the project’s Targets section, choose the add-target action.
  2. Enter a target name.
  3. Choose Define Sequences or Upload Structure as offered by the form.
  4. Add the target components or import a structure from PDB or a file.
  5. Check the extracted chains, sequences, and copies.
  6. Continue to target setup.
Protein target creation with sequence and structure
inputs

Review the structure

For sequence inputs, wait for the structure prediction to finish. For an imported structure, check that the intended chains and residues are present. Inspect the region relevant to your hypothesis. Check chain identity and residue numbering before making selections.

Complete the setup

Follow the setup steps offered for the target. Where a crop is requested, retain the region and structural context needed for the intended interface. Where binding guidance is offered, select regions that the binder should contact or avoid. Review optional flexible-residue selections when the workflow provides them. Review the final target and choose Complete Setup. A completed target can be selected for a design screen. Completing target setup does not itself start a design run. Continue with binder specifications and screen setup.